VideoCharge Studio is a universal video editing software which covers all aspects of web master activities while working with video. It allows user to add watermarks in the video or image, editing video: split video into several parts, extract some scenes, join several video files into one file, perform video editing, create thumbnails for video file and HTML pages to display video in the Internet, work via the command line and many other operations. But such universalism has its own negative sides. For beginners it may seem too difficult to work with VideoCharge Studio.
The software includes Wizard which makes easy your first step in the application. The Wizard covers all aspects of the software usage, but as any Wizard it doesn't allow you to completely use all functionalities of the software. That this why this article describing main principals of the work with the application can be useful for you.
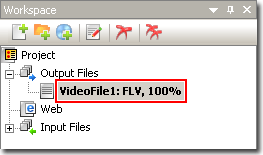
Workspace Tree
The first control element you should pay attention to is the "Workspace" tree:
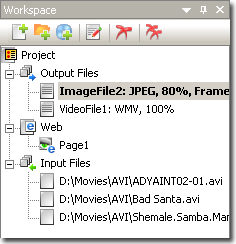
Generally, if you are going to use the application as a video convertor, it is enough for you to work with this tree only. "Workspace" tree allows you to specify files which will be processed, folder where files will be saved to, how to save the results of conversion, set coding parameters for video and audio and do many other things.
It includes a range of elements (nodes). Double click on such node opens a window with node's properties you can specify.
- Project

It is a root element. It just allows you to set a directory where the results will be saved to.
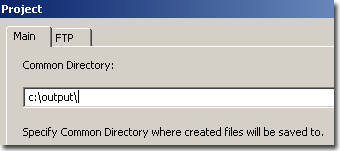
This parameter is not obligatory. For every particular created file this parameter can be set and changed separately.
See also: Setting directories and names for created files.
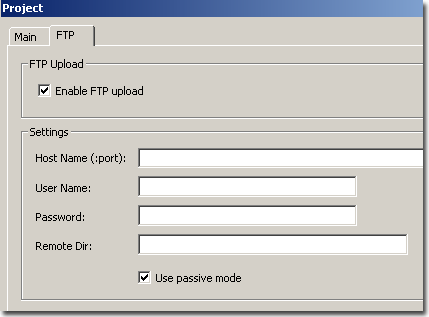
You can also specify FTP server where it is necessary to upload files to.
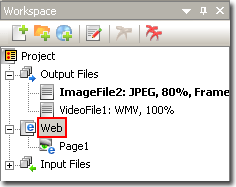
- Output Files

This element is intended to set common parameters for work with video files.
While working with video files, you would want to automatically split video file into several parts: by time, by number of parts.
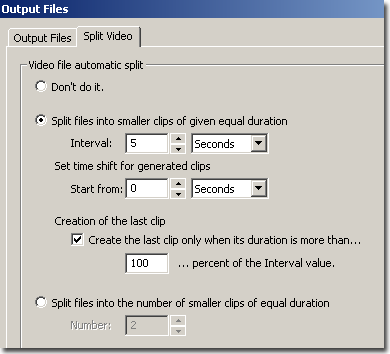
At the same time if you create a video file, the software automatically create several video files according to every part, if you create a graphic file, the software will output graphic files on the base of the first frame of every part.
See also: Split Video File.
- Output format
It is situated under Output Files. You have to specify at least one Output format or as many as you need. Output format name describes what type of file will be created (video or image), file format and some settings.
For Video:
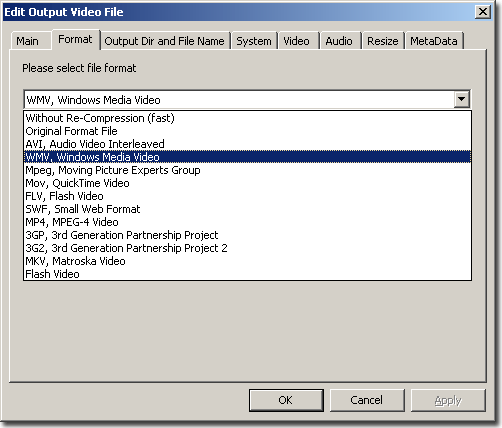
See also: How to convert a video file?
For Image:
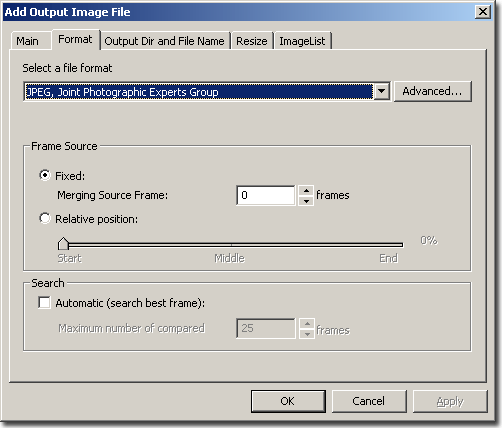
See also: How to convert an image?
This parameter sets which file should be created: video or graphic, and saves all settings. You can go to a corresponding part of the window and specify video coding type, parameters of audio compression and so on.
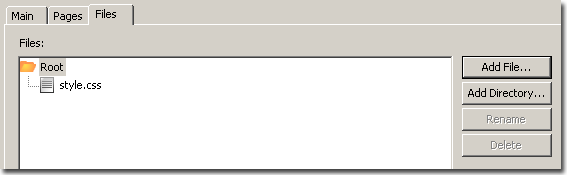
- Web
VideoCharge Studio allows you to create HTML pages to display video in the Internet. Double click on this node will turn on/off this function.
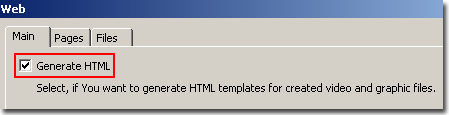
Your HTML pages can contain links to CSS files or/and graphic files. Select Files tab to be able to select all necessary files which should be copied to directory with generated HTML pages.
- HTML page
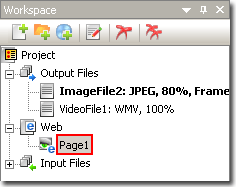
Generated HTML pages are based on your HTML template which you can set by click on the corresponding item: e.g. Page1.
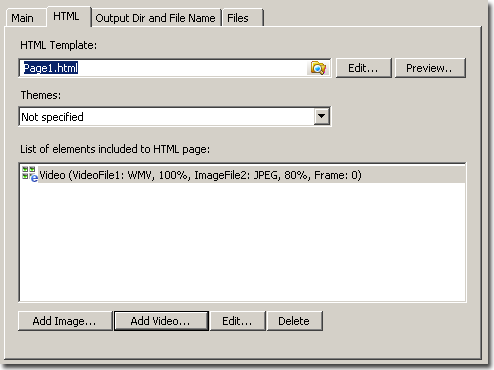
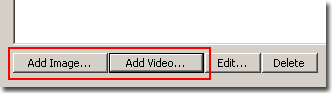
You should also specify which of the created files will be displayed on the page, select thumbnails which will be visible. It is also possible to create HTML pages contained only graphic files. In order to specify what will be displayed on the page, select Add Image or Add Video.
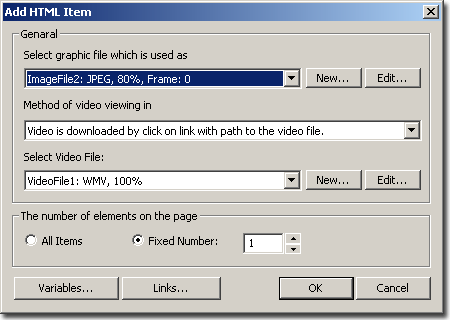
Within the appeared window you can select a graphic format which will be used for creation of thumbnails, video format, and also how many elements should be represented on the page.
The number of pages which will be created directly depends on the number of created video or graphic files. For example, if you have specified to create an HTML page for every single element.

and you create 6 video files (e.g. by splitting a video file into 6 parts or editing 6 different video files), therefore 6 HTML pages will be created to display each video file. Otherwise

only one HTML page will be created to display all created files.
VideoCharge Studio allows you to display video in the Internet using Flash player (likewise youTube):

As Flash player doesn't support all video formats, you should create video using supported formats. To do so, you can select necessary file format or create a new one:

See also: How to convert a video file?
- Initial files which will be processed are under Input Files node.

You can add a new file using a corresponding button on the toolbar:

See also: Adding video files for editing.
A directory with files:

See also: Batch processing.
DVD Drive or DVD directory.

See also: Work with DVD.
Preview
"Preview" section of the main window displays all files which will be created for selected output format. To see the files, it is necessary to select any of output files.
- Work with files.
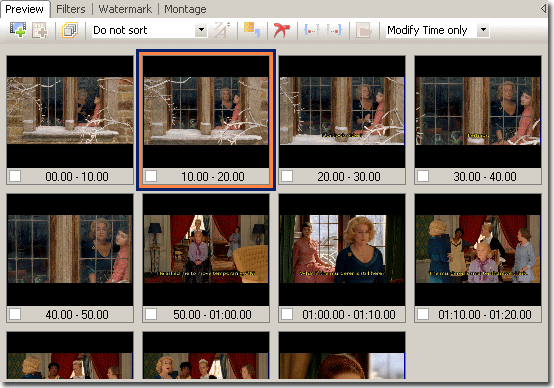
Besides displaying files which will be created, "Preview" window allows you to edit each element before generation. For example, you can select one or several elements and delete them by press Delete key or click a button on the toolbar.

There is a contrary way: select elements you want to edit
open menu by mouse right button click and delete all unselected elements:
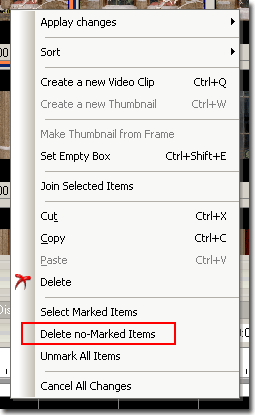
This operation allows you to reduce time of video editing by preliminary deleting unnecessary fragments.
See also: Review of files that are being created.
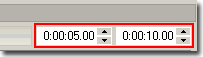
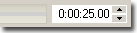
- Set Timeline.
While working with video format, you can set timeline for each element. To do so, select an element in the "Preview" window and set start and end position in the corresponding input fields:
or do it via the Timeline editor:
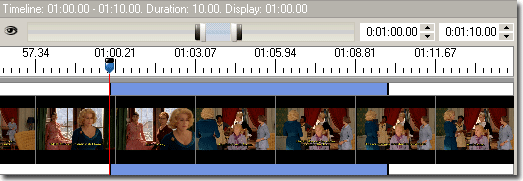
Using mouse, capture one of the boundaries and drag it to the necessary position.
You can also use the current position of the cursor:

Position on the necessary frame and using buttons on the toolbar mark this frame as the beginning or the end of your scene.
See also: How to extract scene out of the video?
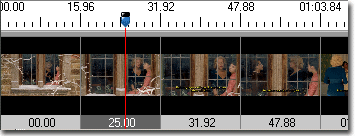
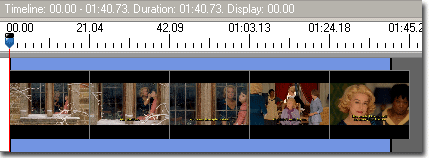
- Timeline editor
Timeline editor displays a tape of frames from the video. This tape is scalable. You can zoom in/out frames selection using scale controls:

To do so, use mouse to capture one of the selected area boundaries and increase or decrease its length.
If you don't want to see the frames, you can disable displaying frames selection

by simply click on the pictogram.
- Extracting several scenes from video.
If you need to cut several fragments out of one video file, you can do it in the following way: select a necessary element, input new one using COPY/PASTE, and set timeline for the new element. For all this operations you can use a corresponding button on the toolbar:

- Join video files.
You can join several video files or scenes into one video file. Select necessary files in the "Preview" window and click on a corresponding button on the toolbar:

- Work with graphic files.
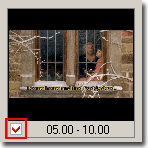
While creating images "Preview" window will display frames which will be the base for future thumbnails.
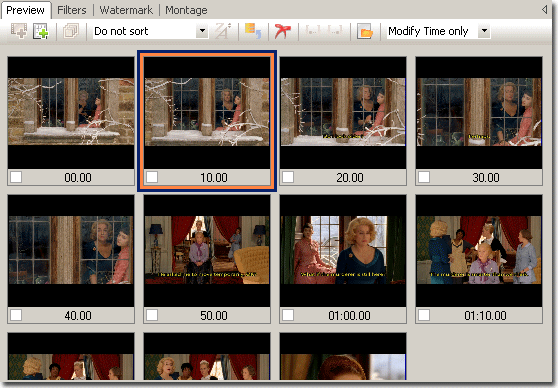
Under every thumbnails there is a time of the frame which is a base for the thumbnails. You can set this time by typing it in the corresponding input field:
Or you can use Thumbnails editor and click on the image you prefer:
You can also use the current cursor position:

Select the time of the fragment you want to create image from and click on a corresponding button on the toolbar.
- Thumbnails Editor.
Thumbnails editor will display a tape of frames of the video. You can zoom in/out the tape using scale control:

To do so, use mouse to capture one of the selected area boundaries and increase or decrease its length.
Thumbnails editor displays all frames from the video allowing you to select the best one. But if you use splitting video into several parts, only frames of the corresponding part are accessible for you to select:

In order to select a frame just click on the pictogram.
- Creation of several thumbnails for video.
If you need to create several thumbnails from one video file, you can do it in the following way: select an element for the given file, use COPY/PAST to get a new element and specify time of a frame for it. You can also use a corresponding button on the toolbar:

Filters
"Filters" is a tab of the main window. In this tab you can select filters and apply them to video or graphic file: correct file's color, contrast, increase sharpness or blur of an image. It is possible to apply CROP to an image and so on.
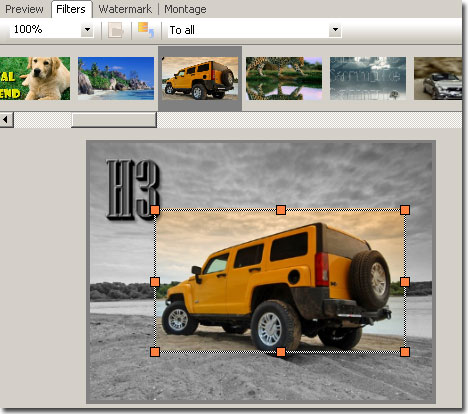
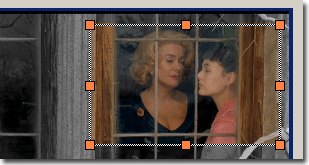
- CROP
CROP is a process of cutting a rectangle area out of an original image. In order to apply CROP, use mouse to capture one of the boundaries and define the necessary rectangle area:
You can set CROP manually. To do so, select CROP section in the window as it is shown below:

Click Reset or press Escape to set to nil CROP values.

See also: CROP.
- Image correction
VideoCharge Studio includes several filters for image correction. They help to change image's parameters.
Filters are divided into two categories. Filters of the first category have parameters. Filters with parameters are specified in the window as it is shown below:
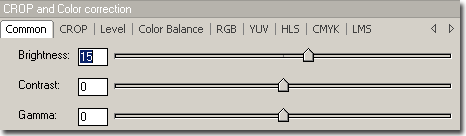
Here you can specify Brightness, Contrast, Gamma, Level, Color Balance and correct image color spaces: RGB, YUV, HLS, CMYK, LMS.
Filters of the second category don't have parameters:

You can set Auto Color Level, Auto Contrast, Enhance color, Sharpen, Soften, Grayscale, Negative, de-Interlace. To apply one of the mentioned filters it is enough to select it by click on its name:

For example, Auto Contrast filter is applied to an image.
- Apply filters to groups of elements.
If you edit several file, sometimes you need to apply CROP or filters not to all elements, but only to specified files. Of course, you can edit these files one by one, but VideoCharge Studio allows you to set parameters both for all files and separated files.
Before create any changes, set the option:
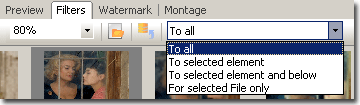
If you select "To All" option, all changes will be applied to all files.
If you select "To selected element" option, all changes will be applied only to the element which is selected at this time.
If you select "To selected element and below", all changes will be applied to the selected element and the rest elements which are below.
If you select "For selected FILE only", all changes will be applied to all elements of the selected file only.
Note: By default an element is a file, but if you split file into parts, each file can contain several elements
- Cancel all changes.
You can cancel all changes made by filters by click a corresponding button on the toolbar:

See also: Apply filters to make better the image.
Watermark
"Watermark tab of the main window allows you to add watermarks to created video or graphic files, blur selected area, draw DVD subtitles, and remove watermark from video file.
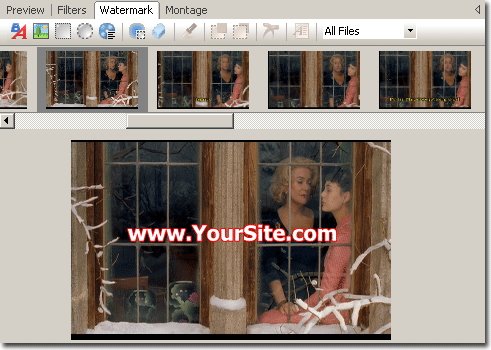
To add a watermark to video or graphic file, use a corresponding button on the toolbar:
In order to add a text watermark:

In order to add a image watermark on the base of a graphic file:

In order to add a rectangle:

In order to add a ellipse:

In order to specify watermark properties select a watermark by click on it. Watermark properties are set in Properties window:
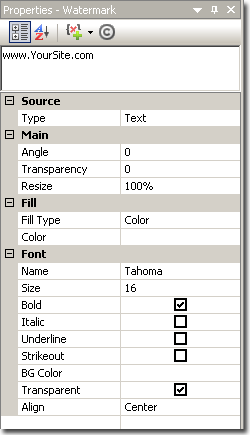
For a text watermark you can specify text, font, size, display angle, transparency. You can also add special symbols or variables, set watermark fill
For a graphic watermark (on the base of your graphic file) you can also specify size and transparent color.
- Watermark position on the screen
In order to set a necessary position of a watermark on the screen, it is enough for you to drag it to a necessary place by mouse. You can also set these parameters manually using special control:
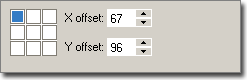
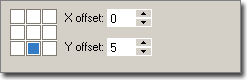
This control, except a position, allows you to set a point relatively which a physical position of the watermark is calculated. If you have several files of different height/width, it could be necessary for you to specify this value so the watermark will be displayed in the bottom of the frame at any height/width of the edited video. Select a point relatively which it is necessary to calculate a watermark position:
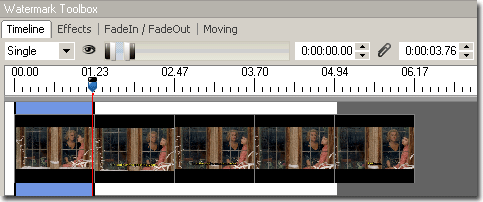
- Timeline
While working with video files, you can set timeline for a watermark. Timeline is a time range when a watermark will be visible in a frame.
For example, it is possible to display a watermark first several seconds of the video file. To do so, use timeline control of Watermark Toolbox.
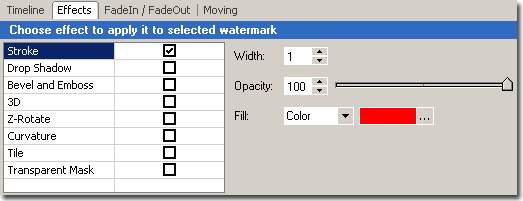
- Effects
In order to make your watermark look fine, you can apply effects to its displaying. For example, it could be a stroke or a shadow. In order to set an effect select Effect tab in the Watermark Toolbox window, select the necessary effect and specify its properties.
- FadeIn/FadeOut
While adding a watermark to the video file it is possible to do so that watermark doesn't appear immediately but gradually or even disappears.
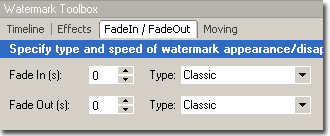
To do so, select FadeIn/FadeOut tab in Watermark Toolbox window and specify duration of watermark appearance/disappearance. For example, if Fade In value is equal to 2 seconds, it means that your watermark will be gradually drawn starting from invisible to completely visible state in two seconds. You can also set another type of watermark appearance/disappearance.
- Moving
While adding a watermark to the video file, you can specify how the watermark should move while video is playing. To do so, click on Moving tab in the Watermark Toolbox window and select a type of watermark moving.

You can just specify a point where your watermark will be moved to and speed of moving.
It is also possible to record watermark moving by sliding watermark while video is playing.
Video Editing
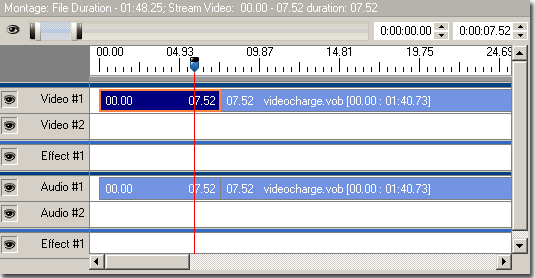
In the "Montage" section of the main window it is possible to perform video editing operations with video files.
Video Editing of the video is similar to constructor: every blue strip in the editor defines video or audio stream of created file. You can add any number of video files, graphic files, add new sound, apply effects to video or sound and save all as a graphic file.
To let you understand how Video Editing of VideoCharge Studio works, we will give you some basic examples which help you to create your own auteur video.
In order to cut a part out of the video file you should do the following:
- Set cursor on the necessary fragment:
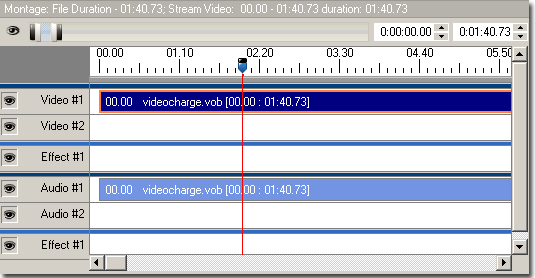
- Click "Split" button:

After that the selected stream will be divided into to substreams:
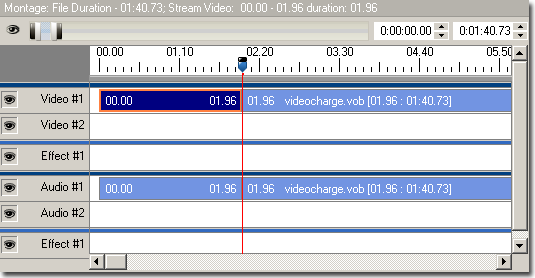
- Set cursor at the end position of cutting out and click "Split" again:
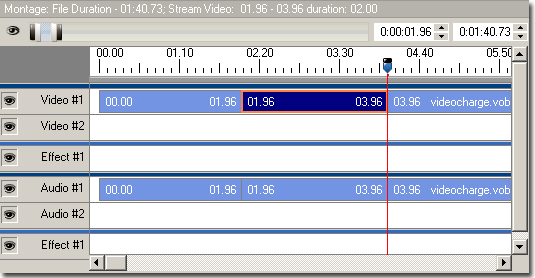
You will get three fragments.
- Delete the middle fragment and join the first and second parts using the mouse.
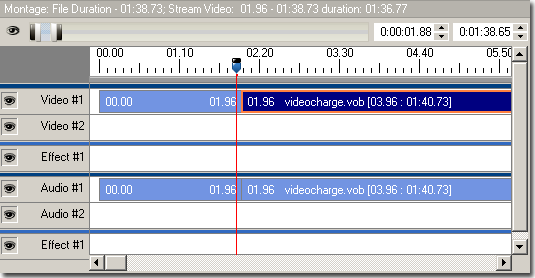
That's all: you have cut out the middle part of the video file.
Addition of video or graphic file.
- Supposedly, you want to add a certain video file at the beginning of your future video. To do so, click on the following button:

and select file you want to embed:
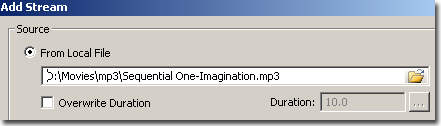
- The selected file will be added to the position of your cursor.
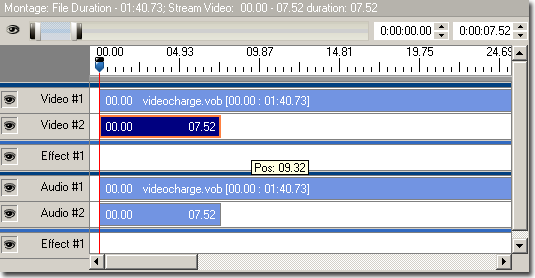
Using the mouse, specify a necessary position for the file:
That's all: your edited file will be joined the file you have just added. In similar way you can add any graphic file or audio file.
Effects application.
You can apply effect of switching between scenes for two or more files. For this operation use the following menu command:

Within the appeared window, select the necessary effect:
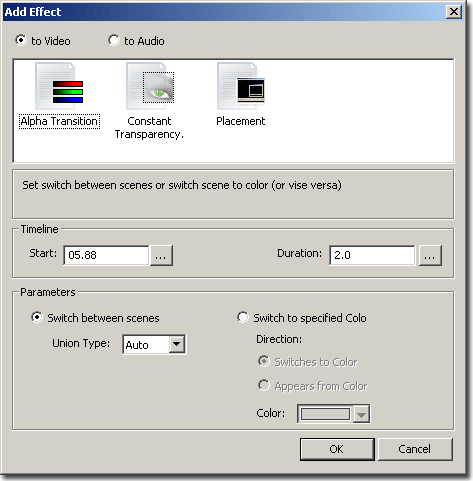
The effect, selected by you, will be added to a position of the cursor and marked as Effect #.
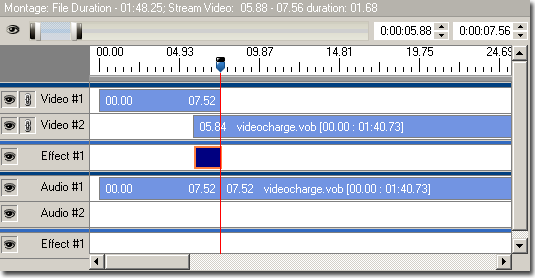
You can move the effect to a necessary position and specify which video stream should be applied to (for this, select a clip for a video stream).
The example in the picture above shows application of the effect of smoothly switching between scene 1 and 2.
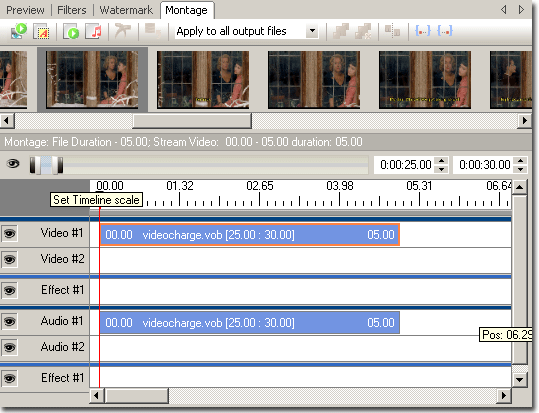
While selecting any of the streams, you can edit its Timeline (time range from a video file) using Timeline window:
You can also view files which compose the stream and play these files in case of necessity.
|